

You can redesign your WordPress site without losing search traffic by following a systematic protection plan that preserves your URLs, content structure, and SEO signals throughout the transition. The process takes two to four weeks from planning through verification, and while it demands careful attention to detail, it’s completely manageable even if you’re relatively new to WordPress website setup.
Here’s what makes the difference between a successful redesign and a traffic disaster: preparation. Most site owners who lose rankings during a redesign skip the documentation phase or fail to set up proper redirects. They launch their beautiful new design and watch their visitor numbers plummet within weeks. You’re going to avoid that outcome entirely.
A well-executed redesign actually gives you the opportunity to improve your search performance. When you preserve what’s working while fixing broken links, improving page speed, and updating outdated content, Google often rewards the refresh with better rankings. I’ve seen site owners increase their organic traffic by 20 to 40 percent within three months of a properly managed redesign.
The key is treating your existing search traffic as the foundation you’re building on, not something that will automatically carry over. Every URL that currently brings visitors needs a clear path forward. Every piece of ranking content requires protection. This guide walks you through exactly how to document what you have, implement your redesign safely, and verify that nothing broke in the process. Whether you’re working solo or collaborating with designers like A Creative Agency these steps give you the confidence to move forward without the fear of losing what you’ve worked hard to build.
Why Website Redesigns Can Hurt Your Search Traffic
Search engines view your website like a library catalog. When you redesign without proper care, you’re essentially rearranging all the books without updating the catalog system, making it impossible for visitors to find what they’re looking for.
The biggest killer of search traffic is changing your URLs without proper redirects. When you move content from one URL to another, search engines and visitors who bookmarked your pages hit dead ends. Google sees these broken links as a sign that your content has disappeared, and it will eventually remove those pages from search results. Properly using 301 redirects after moves tells search engines where your content went, preserving the value you’ve built.
Removing or drastically changing important content confuses search engines about what your site offers. That blog post ranking on page one for your best keyword? If you delete it or merge it carelessly into another page, you’ll lose that ranking. Search engines reward sites that maintain consistent, valuable information.
Site structure changes matter more than most people realize. Your internal linking pattern helps search engines understand which pages are most important. When you redesign, breaking these connections or burying important pages deeper in your navigation sends signals that those pages matter less now.
Page speed and mobile responsiveness have become ranking factors themselves. A beautiful new design that loads slowly or looks broken on phones will cost you traffic, even if everything else stays perfect. Search engines prioritize user experience, and a redesign that makes your site harder to use will hurt your rankings regardless of how good it looks.
What You’ll Need Before Starting Your Redesign

Before you touch anything on your live site, gather the right tools and information. Having these essentials in place transforms a risky redesign into a controlled, reversible process. You don’t need expensive software or advanced technical skills, just the right access and a few free or low-cost resources.
Here’s what you need ready before you begin:
- Google Analytics access, tracks your current traffic levels and shows which pages visitors actually use
- Google Search Console access, reveals how search engines see your site and which keywords bring you traffic
- A reliable backup plugin, creates a complete snapshot you can restore if something goes wrong
- Staging environment or local development setup, provides a safe testing space separate from your live site
- Spreadsheet software, helps you map old URLs to new ones and track redirect planning
- WordPress admin access, ensures you can make necessary changes and install plugins
- SEO plugin (optional but helpful), assists with managing redirects and preserving meta information
If you’re new to managing your own site, don’t worry about mastering every technical detail right now. Focus on confirming you have admin login credentials and can access your Google Analytics and Search Console accounts. Many hosting companies include staging environments and backup tools in their dashboards, so check what’s already available before installing additional plugins.
For spreadsheet work, Google Sheets or Excel works perfectly fine. You’re simply creating lists, not complex formulas. The same goes for backup plugins, popular free options like UpdraftPlus or Duplicator handle the job well for most sites. If you understand WordPress basics like installing plugins and accessing your dashboard, you already have enough technical knowledge to use these tools.
The key is having everything accessible before you start making changes. Scrambling to set up analytics access or create backups mid-redesign adds unnecessary stress and risk.
Document Your Current Site Before Making Changes

Create a Complete URL Inventory
Start by creating a comprehensive list of every URL on your WordPress site, this inventory becomes your safety net during the redesign. Without it, you risk forgetting pages that need redirects, which leads directly to broken links and lost traffic.
The easiest method is using your WordPress admin panel. Go to Tools > Exportselect “All content,” and download the XML file. Open this file in a spreadsheet program, and you’ll see all your posts and pages with their URLs. Copy these URLs into a simple spreadsheet with one column labeled “Current URLs.”
For a more complete inventory including category pages, tag pages, and custom post types, download the free version of Screaming Frog SEO Spider. Enter your site’s URL, click “Start,” and let it crawl your entire site. Once finished, go to Internal > HTML and export the list. This gives you every discoverable URL.
Save this spreadsheet carefully, you’ll add your new URLs next to these in the planning stage, creating your redirect map.
Record Your Traffic and Ranking Baseline
Before you change anything on your site, you need to know exactly how it’s performing right now. This baseline lets you measure whether your redesign worked or caused problems.
Start with Google Analytics. Log in and look at your traffic from the past three months. Write down your total monthly visitors and note your top 10 most-visited pages. These pages are your traffic engines, and you’ll want to protect them carefully during the redesign.
Next, open Google Search Console and go to the Performance report. This shows which search terms bring people to your site. Export your top 20-30 keywords along with their current positions. A keyword ranking at position 5 today should still rank around position 5 after your redesign.
Take screenshots of these reports and save them with today’s date. When you check again in a few weeks, you’ll have a clear before-and-after comparison. If traffic stays steady or grows, you’ll know your redesign succeeded. If it drops significantly, you’ll have data showing exactly which pages or keywords need attention.
This snapshot takes 15 minutes but gives you the evidence you need to redesign confidently.
Plan Your New Site Structure to Preserve SEO Value
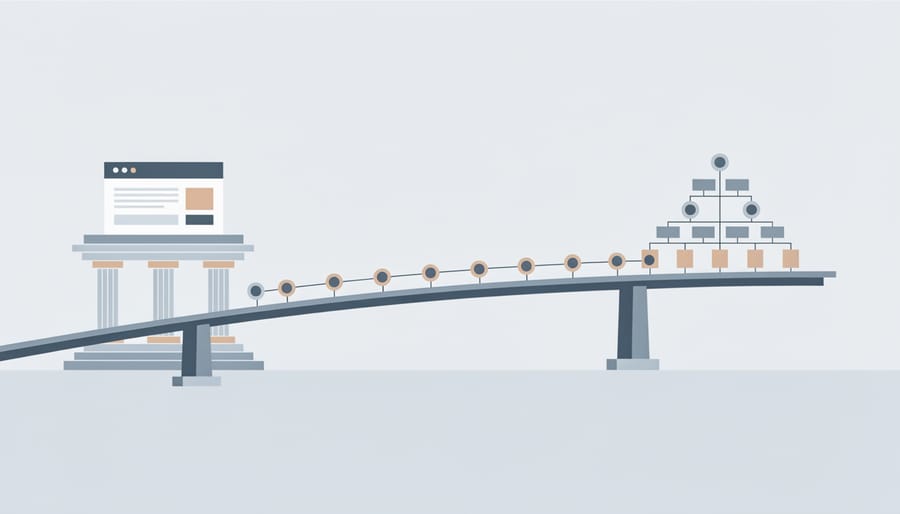
Decide What to Keep, Change, or Remove
Start by logging into Google Analytics and navigating to Behavior > Site Content > All Pages. Sort by pageviews to see which pages attract the most visitors. These high-traffic pages are your non-negotiables, they must stay or move to new URLs with proper redirects. Don’t touch their core content without good reason.
Next, open Google Search Console and check the Performance report. Filter for pages that rank in the top 10 positions for valuable keywords. Even if traffic seems modest, strong rankings represent hard-won SEO value worth protecting. Note these pages in your spreadsheet alongside their primary keywords.
Now identify content that needs updating rather than removal. Look for pages with declining traffic, outdated information, or thin content that could be strengthened. Can you merge three shallow posts about WordPress plugins into one comprehensive guide? Consolidation often works better than deletion, and you can redirect the old URLs to the improved version.
For low-performing pages, check both traffic and inbound links. A page with zero visits might still support your site structure or receive backlinks from other sites. Use a WordPress SEO checklist to evaluate each page’s strategic value beyond just traffic numbers.
Safe-to-remove candidates typically have no traffic, no rankings, no backlinks, and no internal linking value. Even then, plan redirects to your homepage or a relevant category page rather than leaving 404 errors.
Map Your URL Changes and Redirects
Start by opening a simple spreadsheet in Google Sheets or Excel. Create three columns with these headers: “Old URL,” “New URL,” and “Notes.”
In the “Old URL” column, paste the complete list of pages you documented earlier. Include the full web address for each page, starting with your domain name. For example: or .
Next, fill in the “New URL” column. If a page is staying exactly the same, copy the old URL into the new URL column. If you’re changing the page slug or moving it to a different section, write the complete new address. For deleted pages with valuable traffic, find the most relevant existing page to redirect visitors to, check your traffic data to identify pages worth redirecting.
Add brief notes in the third column explaining your reasoning, especially for deletions or major changes. This helps you remember why you made each decision.
Leave URLs unchanged whenever possible. Only change them if you’re restructuring your site significantly, merging similar content, or fixing genuinely poor URL structures. Every change requires a redirect, which adds complexity and small ranking risk.
For pages you’re removing entirely, redirect them to the closest related content. Never let high-traffic pages become dead ends. Low-traffic pages with no relevant alternative can redirect to your homepage or a category page.
Save this spreadsheet. It becomes your master redirect guide for implementation.
Step-by-Step: Redesign Your Site Safely
Set Up Your Staging Site
A staging site is your practice space, a complete copy of your WordPress site where you can test your redesign without affecting what visitors see. Think of it as your safety net.
Most WordPress hosting providers include free staging built right into your dashboard. Log into your hosting account and look for buttons labeled “Staging,” “Create Staging Site,” or “WP Staging” in your control panel. Popular hosts like SiteGround, Bluehost, and WP Engine make this a one-click process.
If your host doesn’t offer staging, install a free plugin instead. WP Staging creates a copy of your site in minutes without technical knowledge. Just install it from your WordPress dashboard, click “Create New Staging Site,” give it a name, and let it run. The plugin handles everything automatically.
Once your staging site is ready, you’ll get a temporary URL to access it. Bookmark this link. This is where you’ll build and test your entire redesign. Change themes, rearrange pages, update content, experiment freely knowing nothing affects your live site.
Test thoroughly on staging first. Only when everything works perfectly do you push those changes live. This single step prevents most redesign disasters.
Implement Your 301 Redirects Correctly
Setting up redirects is simpler than most people think, especially with a free WordPress plugin doing the heavy lifting. Here’s the straightforward process to protect your search rankings:
First, install a redirect plugin from your WordPress dashboard. Navigate to Plugins, then Add New, and search for “Redirection”, it’s the most popular free option with millions of active installations. Click Install Now, then Activate.
Once activated, you’ll find Redirection in your WordPress admin menu. Click it, and you’ll see a simple interface asking for your old URL and new URL. Here’s exactly what to do:
In the Source URL field, enter the old page path (everything after your domain name). For example, if your old page was, you’d enter `/services/web-design`.
In the Target URL field, enter where visitors should land instead. This can be the full URL of the new page, like `/solutions/website-design`.
Under the redirect type dropdown, select “301, Moved Permanently”. This tells search engines the move is permanent and transfers your ranking power to the new page.
Click Add Redirect, and your first redirect is live.
Before launching your redesigned site, test every redirect you’ve created. Open a private browsing window, type in an old URL, and press enter. You should land on the correct new page without seeing any error messages. Check at least five of your most important redirects this way, it takes two minutes and prevents major headaches later.
Preserve Your On-Page SEO Elements
Your new design can look completely different while keeping the SEO elements that search engines rely on. Think of these elements as the foundation that supports your rankings, they need to transfer intact to the new site.
Start with your meta titles and descriptions. In your staging site, open each important page and check that the title tag and meta description match (or improve upon) what’s currently ranking. If you’re switching themes, these sometimes get reset to defaults. Don’t let that happen. Your Yoast SEO or Rank Math settings should carry over, but verify them page by page for your top traffic generators.
Check your header tags next. Your H1 should remain your primary topic statement, with H2s and H3s organizing subtopics in a logical hierarchy. The new design might style these differently, but the structure underneath should stay consistent. Search engines use this hierarchy to understand your content organization.
Your internal links deserve special attention. If you’re redesigning your navigation or sidebar, make sure links between related posts still exist. These connections help search engines understand your site’s topical relationships and guide visitors to more helpful content.
Don’t overlook image alt text. When you migrate images to the new design, alt descriptions should transfer with them. If you’re adding new images or optimizing existing ones for faster WordPress images write descriptive alt text that explains what each image shows.
Finally, your actual content, the words on the page, should remain at least as comprehensive and helpful as before. You can definitely improve unclear sections or add new information, but don’t cut explanatory paragraphs just to make pages look cleaner. Search engines ranked your content because it answered questions thoroughly.
Test Everything Before Going Live
Before you push your redesigned site live, spend time testing every critical element. This is your chance to catch problems while fixing them is simple and risk-free.
Start by testing your redirects. Visit old URLs directly in your browser and confirm they send you to the correct new pages. Check at least 10-15 redirects from different sections of your site. If any return a 404 error or send you to the wrong page, fix them now.
Next, check your site on mobile devices. Pull out your phone and browse through your most important pages. Text should be readable without zooming, buttons should be easy to tap, and images should fit the screen properly. If something looks broken on mobile, your visitors will leave and search engines will notice.
Test your page speed using free tools like Google PageSpeed Insights. Your redesigned pages should load as fast as your old ones, or faster. Slow pages frustrate visitors and hurt rankings.
Click through your navigation menu and internal links to find any broken connections. Test your contact forms by submitting test entries to ensure they actually reach your inbox.
Finally, open your staging site in different browsers, Chrome, Firefox, and Safari at minimum. Your design should look right in all of them.
Critical Warnings: Stop If You See These Problems
Some warning signs during your redesign are so serious they should make you pause immediately and fix the problem before going any further. Catching these issues early protects the search traffic you’ve worked hard to build.
Watch for a sudden spike in 404 errors, if your testing shows dozens or hundreds of “page not found” errors, your redirect mapping has serious gaps. Every 404 means a page that previously existed (and potentially ranked) is now broken. Go back to your URL inventory and verify every old URL has a proper redirect in place.
Redirect loops will crash your site. This happens when Page A redirects to Page B, which redirects back to Page A, creating an endless cycle. Test each redirect individually to confirm it lands on the correct final destination without bouncing around. Most browsers will show a “too many redirects” error if you’ve created a loop.
Page speed matters enormously to search engines. If your new design loads dramatically slower than your current site, we’re talking going from two seconds to six or seven seconds, you need to troubleshoot before launch. Heavy themes, unoptimized images, or excessive plugins often cause this. Run speed tests on both your current and staging sites to compare.
Mobile display problems will hurt your rankings fast. Open your staging site on an actual phone and check that text is readable, buttons work, and nothing breaks or runs off the screen. Google prioritizes mobile experience, so a broken mobile layout is a dealbreaker.
Finally, verify your staging site isn’t being indexed by search engines. Check that your staging environment has a “noindex” tag in place, tools like All in One SEO make this simple to verify. If Google accidentally indexes your unfinished staging site instead of your live site, you’ll see traffic tank. This is a preventable mistake that can avoid SEO penalties and protect your rankings.
These warnings exist to save you from easily preventable disasters. Take them seriously.
Launch Day: Go Live the Right Way
You’ve done the preparation work, tested everything thoroughly, and you’re ready to make your redesigned site live. Launch day doesn’t need to be stressful when you follow a clear sequence and verify each step as you go.
Start by creating one final backup of your current live site. This is your safety net if anything unexpected happens. Most hosting control panels let you create a full backup with one click, or you can use your backup plugin to download a complete copy. Store this backup somewhere safe, your computer and cloud storage both work well.
- Create a complete backup of your live site and download it to your local computer
- Push your staging site to live using your hosting’s staging tools or manually upload files if needed
- Immediately check that your homepage loads correctly and displays the new design
- Log into Google Search Console and submit your updated XML sitemap
- Visit five to ten important pages on your site to confirm they load without errors
- Open Google Analytics and verify that it’s tracking your visit in real-time reports
- Test a handful of your planned redirects by visiting old URLs to confirm they send you to the right new pages
- Check your site on your phone to ensure mobile display works properly
Once you’ve completed these steps, your redesigned site is officially live. The first hour is the most critical for catching obvious problems, so resist the urge to celebrate just yet.
Keep your browser open to Google Search Console and Analytics for the rest of the day. Check back every few hours to spot any immediate crawl errors or tracking issues. Small fluctuations in traffic today are normal, people are still finding your site through their cached search results and bookmarks.
Verify Your Traffic Is Protected (Post-Launch Monitoring)
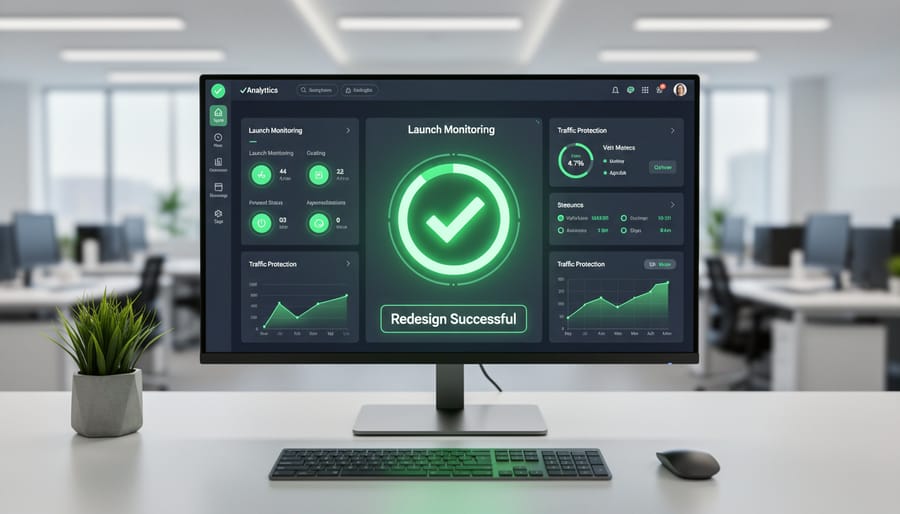
What to Do If Traffic Drops
If you notice your traffic declining after launch, don’t panic, most issues can be fixed quickly when caught early.
Start by checking your redirect setup. Use a redirect checker tool or manually test your old URLs by entering them in a browser. If any redirect to a 404 page or create loops (where URL A redirects to B, which redirects back to A), fix these immediately in your redirect plugin.
Next, look for new 404 errors in Google Search Console under “Coverage” or “Pages.” If you see a sudden spike in “Not found” errors, these are URLs that lost their redirects or were inadvertently changed. Create 301 redirects from each broken URL to its correct new location.
Review Search Console’s “Manual Actions” section to confirm you haven’t received any penalties. Check the “Core Web Vitals” report and run a page speed test, if your redesign significantly slowed down your site, this directly impacts rankings. Consider temporarily disabling resource-heavy plugins or optimizing large images.
Compare your current Analytics data to your baseline documentation. A 10-15% fluctuation in the first week is normal as search engines recrawl your site. However, if traffic drops by 30% or more and stays down for two weeks despite fixing redirects and 404s, you may need to consider rolling back to your previous design while you troubleshoot the underlying issues.
Remember: you documented everything before starting, so you always have a safe restore point.
Real Success Stories: Redesigns That Kept Their Traffic
When Sarah Martinez redesigned her food blog after three years, she worried about losing the 8,000 monthly visitors she’d worked so hard to build. “I created a spreadsheet with every single URL and made sure each one had a redirect planned,” she explains. “I also kept all my recipe posts exactly where they were, even though I wanted to reorganize.” Two months after launch, her traffic had actually increased to 8,500 monthly visitors. “The planning spreadsheet saved me. I caught twelve URLs that would have become dead links.”
Tech consultant Mike Chen took a gradual approach when updating his WordPress site. “I redesigned five pages at a time, starting with my least-trafficked content,” he says. “I tested each batch for a week before moving forward.” His methodical process meant he could catch and fix a redirect loop before it affected his high-traffic service pages. His organic traffic stayed stable throughout the three-month redesign period, dropping only 2% temporarily before recovering fully.
Photography portfolio owner Jennifer Kim credits thorough testing for her smooth transition. “I spent two full days clicking through every page on my staging site, checking that redirects worked and images loaded fast,” she shares. Her preparation paid off when she launched the new design. Three months later, her search traffic had grown 15%, with no ranking drops for her target keywords.
Common Questions About WordPress Redesigns and SEO
After you’ve planned and launched your redesign, you probably have some lingering questions about the process. Here are answers to the concerns we hear most often from WordPress site owners going through redesigns.
How long before I know if my traffic is safe?
You’ll see initial signals within 7-14 days, but wait a full 4-6 weeks to judge whether your redesign successfully protected your search traffic. Expect minor fluctuations in the first two weeks as search engines recrawl your site.
Do I need to notify Google about the redesign?
You don’t need to announce the redesign directly, but you should submit your updated sitemap through Google Search Console immediately after launch. This helps Google discover your changes faster.
Can I change my domain during a redesign?
Yes, but it adds significant risk and requires extra steps including 301 redirects from every old domain URL to the corresponding new domain URL. If possible, keep domain changes and redesigns as separate projects.
Should I do a complete redesign or make gradual changes?
Gradual changes reduce risk but take longer. A complete redesign done properly with all the protective steps can be safe, especially if you’re working in a staging environment and testing thoroughly before launch.
If you’re just changing your WordPress theme without altering your site structure, URLs, or content, the risk to your search traffic is much lower. Theme changes primarily affect appearance and layout. As long as your new theme loads quickly, displays well on mobile devices, and doesn’t remove important content from pages, your rankings should remain stable. Still, test everything in staging first and keep your 301 redirects ready just in case your permalink structure changes unexpectedly.
Many site owners wonder whether they need technical skills to protect their traffic during a redesign. The honest answer is that you need to be comfortable following detailed instructions and checking your work carefully. You don’t need to be a developer, but you should understand how to install WordPress plugins, export data from Analytics and Search Console, and verify that redirects work correctly. If any of those tasks feel overwhelming, consider hiring a WordPress professional to help with the technical implementation while you focus on design and content decisions.
The difference between a successful redesign and a traffic disaster usually comes down to patience and documentation. Rushing through the process or skipping the redirect mapping step causes most problems. Give yourself adequate time to work through each protective measure, and you’ll preserve what you’ve built.
Redesigning your WordPress website doesn’t have to be a gamble with your search traffic. You’ve built your rankings over time, and with the right approach, you can give your site a fresh look while keeping every bit of that hard-earned visibility.
The key is treating your redesign as a planned process rather than a quick makeover. Document everything before you start so you know exactly what you’re protecting. Map out your redirects carefully, matching every changed URL to its new location. Test thoroughly in your staging environment before anything touches your live site. Then monitor your results for several weeks after launch to catch any issues while they’re still easy to fix.
This might feel like extra work, but each protective step saves you from the months of recovery time that a traffic drop would require. The site owners who maintain their rankings during redesigns aren’t lucky. They’re simply following a methodical process that puts safeguards in place.
Your next step is simple: start with the documentation phase. Create that URL inventory and record your current traffic baseline. Once you have that foundation, you can move forward with confidence, knowing you have a clear map of what needs protecting and a backup plan if something goes wrong.
You’ve got this. Take it one careful step at a time, and your redesigned site will look better without sacrificing what you’ve built.